How to annotate screenshots from the iPhone Share sheet
When you just need to circle a bug in Safari, add a quick stamp on an email receipt, or blur out a phone number before replying in Slack, opening a separate editing app feels heavy. SnipMark puts a full vector markup bar directly inside the iOS Share sheet so you can mark and send without switching apps.
SnipMark · iOS 17+ (Universal Purchase with Mac)
1. Open SnipMark directly from any iPhone or iPad Share sheet
In Photos, Safari, Mail, Files, or any app with a standard iOS Share button, select one or more screenshots and tap Share → SnipMark. The screen opens directly into SnipMark’s Quick markup sheet without pulling you out of the app you started in.
If SnipMark does not appear on the first row, tap More, scroll to the bottom, tap Edit Actions, and switch SnipMark on (pinning it near the top keeps one-tap access ready). Need step-by-step setup help? Visit SnipMark support.
2. Draw sharp arrows, shapes, stamps, and blur without switching apps
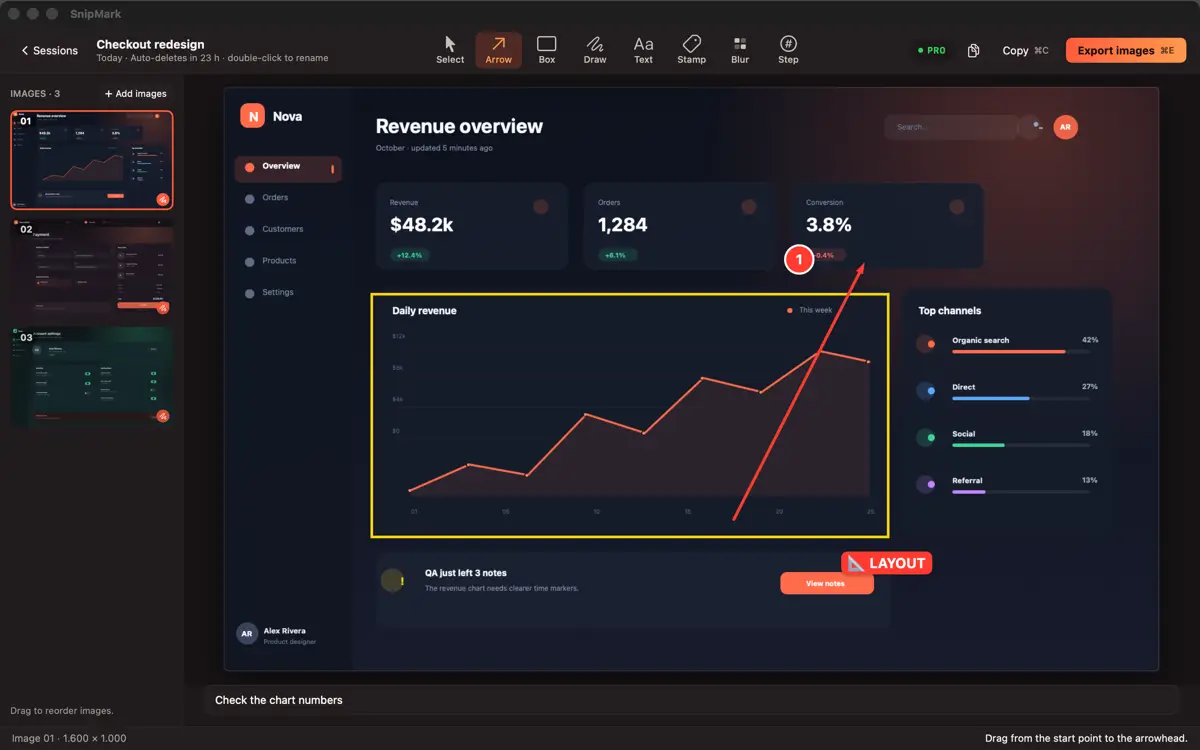
Across the bottom toolbar of the Quick markup view, SnipMark gives you five immediate tools alongside Undo: Select (tap and drag any mark to reposition), Arrow, Rectangle, Blur, and Stamp.
Tap the Style pill above the tools to pick colors (Red, Yellow, or Blue), adjust Line width and Opacity for arrows and boxes, or configure the four built-in review stamps: ❌ DELETE, ✏️ EDIT TEXT, 📐 LAYOUT, and 🐛 LOGIC BUG.
Hiding a password, address, or face before sending? Switch to Blur, open Style, choose between Pixelate, Blur, and an opaque Solid black bar, and adjust Strength (1–10). See our dedicated guide to blurring sensitive info on iPhone for when to pick Solid vs. Pixelate.
3. Flip through multi-image batches and add per-shot notes
Shared two or three screenshots together? Use the Previous image and Next image arrows (showing 1/N) to step cleanly through the batch while keeping separate annotations on every screenshot. Tap the Note icon to open the sheet and type context under Add a note (optional) for that specific shot.
SnipMark Free lets you mark up to 3 images per Share batch (when you select more, a banner notes the Free plan limit and opens the first 3 so nothing is lost) with a subtle export mark. SnipMark Pro ($9.99 one-time) removes the 3-image Share limit and exports cleanly with no watermark.
4. Choose between immediate sharing or Save to SnipMark
SnipMark’s Share extension gives you two clear exits depending on whether the job is finished or part of a larger report:
Continue sharing… — Choose Chat ready (which shows a live estimated output byte size on single images for tight chat uploads) or Original quality, then tap Continue sharing… to flatten your vector marks and open the system share sheet for Slack, Messages, Mail, or Save to Files.
Save to SnipMark — Tap Save to SnipMark in the top-right bar to save your images, annotations, and optional notes into a new SnipMark session inside the main app. Open that session later whenever you want numbered Step number callouts (1, 2, 3), text boxes, freehand strokes, batch renaming with templates, Long stitch, or a Merged PDF.
On-device privacy and Universal Purchase across Apple devices
Everything in the Share extension—decoding images, blurring regions, flattening marks, and estimating output sizes—runs locally on your iPhone or iPad with no account, no cloud upload, and no analytics SDKs. Saved working sessions automatically clean themselves up from local app storage 24 hours after your last update.
Unlocking SnipMark Pro on the App Store uses Apple Universal Purchase, so the same one-time upgrade covers iPhone, iPad (iOS 17+), and Mac (macOS 14+). For desktop shortcuts and region capture on macOS, check how to annotate screenshots on Mac.