
How to capture and annotate a screenshot on Mac
A clear screenshot can explain a question or show a teammate exactly where to look. This guide covers macOS capture shortcuts and an annotation workflow with SnipMark by Arelunio Labs.
SnipMark · macOS 14+
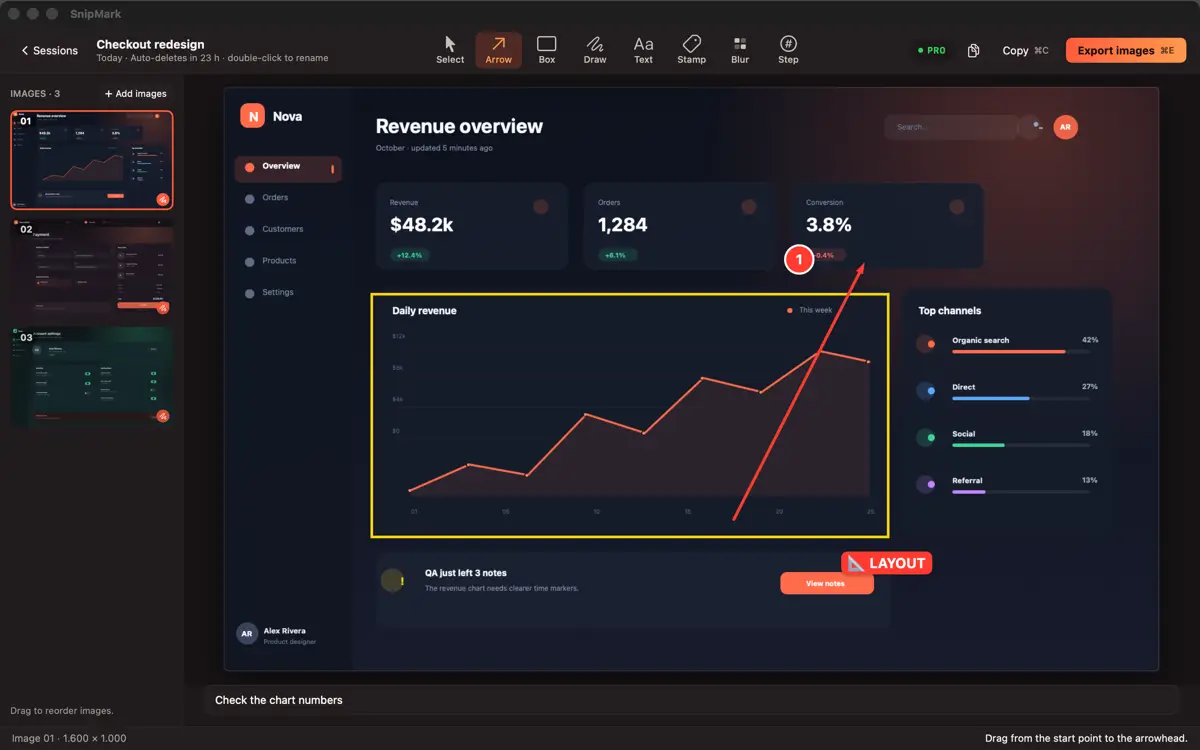
1. Capture the part of the screen you need
On macOS, press Shift-Command-4 and drag across the area you want to capture. Press Escape to cancel. You can also press Shift-Command-5 to open the screenshot controls and choose a capture mode.
To capture a region with SnipMark, grant screen recording access when macOS asks. If access is disabled, check Privacy & Security in System Settings and restart the app when prompted. See SnipMark support for setup help.
2. Show the reader where to look
Use an arrow to point to the relevant control, and add a short label to explain the action or question. For a sequence, numbered arrows can make the order clear. Keep the surrounding context visible so the reader can recognize the screen.
macOS also lets you open the screenshot thumbnail and use its Markup tools. SnipMark provides an editor for adding vector annotations to your captures.
3. Review and export
Before sharing, inspect the entire image for names, account details or other information you did not intend to include. Crop or retake the screenshot if necessary.
SnipMark supports JPEG, PNG, WebP and HEIC image exports. The free tier supports up to three images per session and adds a watermark to exports. Pro unlocks merged PDF and long-stitch output. Choose a format suited to the destination and check the exported file before sending it.
Where does macOS save screenshots?
By default, macOS saves screenshots to the desktop. To choose another location, press Shift-Command-5 and open Options. To copy a screenshot instead of saving a file, hold Control along with the capture shortcut and paste it where needed. See Apple’s screenshot instructions.
Where are screenshots processed?
SnipMark processes screenshots on your device. Visit the privacy page for details about local sessions and exported files. The SnipMark product page describes availability and features.
Need to share several captures together? Learn how to combine screenshots into a PDF on Mac.
Before sharing private material, read how to hide sensitive information in a screenshot.
If an image is too large to send, see how to reduce screenshot file size on Mac.